GE Refrigerator Not Cooling: Causes and Solutions

GE Refrigerator Not Cooling: Causes and Solutions: GE Refrigerator Not Cooling: Causes and Solutions: If you have a GE refrigerator that is not cooling properly, you may be wondering what is wrong and how to fix it. A refrigerator that is not cooling can cause food spoilage, waste of energy, and frustration. Fortunately, there are some common reasons why a GE refrigerator may not cool and some simple solutions that you can try at home. In this post, we will explain the possible causes and solutions for a GE refrigerator not cooling problem and provide some tips and tricks to prevent it from happening again in the future.
READ ALSO: LG Refrigerator Not Cooling: Causes and Solutions
How to Check if Your GE Refrigerator is Not Cooling
The first step to troubleshoot your GE refrigerator not cooling problem is to check if it is actually not cooling or if it is just a perception issue. Sometimes, the refrigerator may seem warmer than usual because of external factors, such as high ambient temperature, frequent door opening, or placing hot food inside.
To check if your GE refrigerator is not cooling, you can use an appliance thermometer or a digital thermometer to measure the temperature inside the fridge and freezer compartments. The ideal temperature for the fridge compartment is between 1°C and 7°C, and for the freezer compartment is between -15°C and -23°C. If the temperature is higher than these ranges, then your GE refrigerator is not cooling properly and needs further investigation.
Possible Causes and Solutions for a GE Refrigerator Not Cooling Problem
There are several factors that can affect the cooling performance and the temperature of your GE refrigerator. Some of them are easy to fix, while others may require professional assistance. Here are some of the most common causes and solutions for a GE refrigerator not cooling problem:
Dirty Condenser Coils
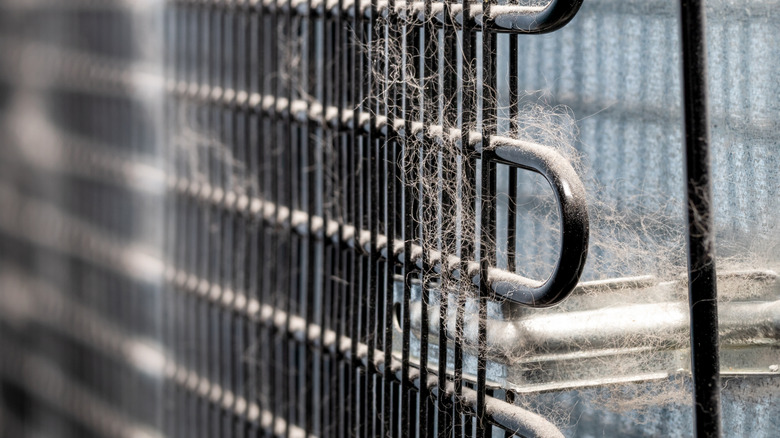
The condenser coils are located at the back or the bottom of the refrigerator and are responsible for releasing the heat that is absorbed by the refrigerant from the inside of the fridge. Over time, the condenser coils can get dirty and dusty, which reduces their efficiency and makes the refrigerator work harder to cool down. This can result in higher energy consumption and poor cooling performance.
Solution: Clean the Condenser Coils
To clean the condenser coils, you will need a vacuum cleaner, a soft brush, and a cloth. Follow these steps:
- Unplug the refrigerator from the power source and pull it away from the wall.
- Locate the condenser coils at the back or the bottom of the refrigerator. They may be covered by a metal or plastic panel. Remove the panel and expose the coils.
- Use the vacuum cleaner to remove the dust and dirt from the coils. Be careful not to damage the coils or the wires.
- Use the soft brush to gently brush off any remaining dust or dirt from the coils.
- Use the cloth to wipe the coils and the surrounding area.
- Replace the panel and push the refrigerator back to the wall.
- Plug the refrigerator back in and check if the cooling performance has improved.
Faulty Condenser Fan or Evaporator Fan
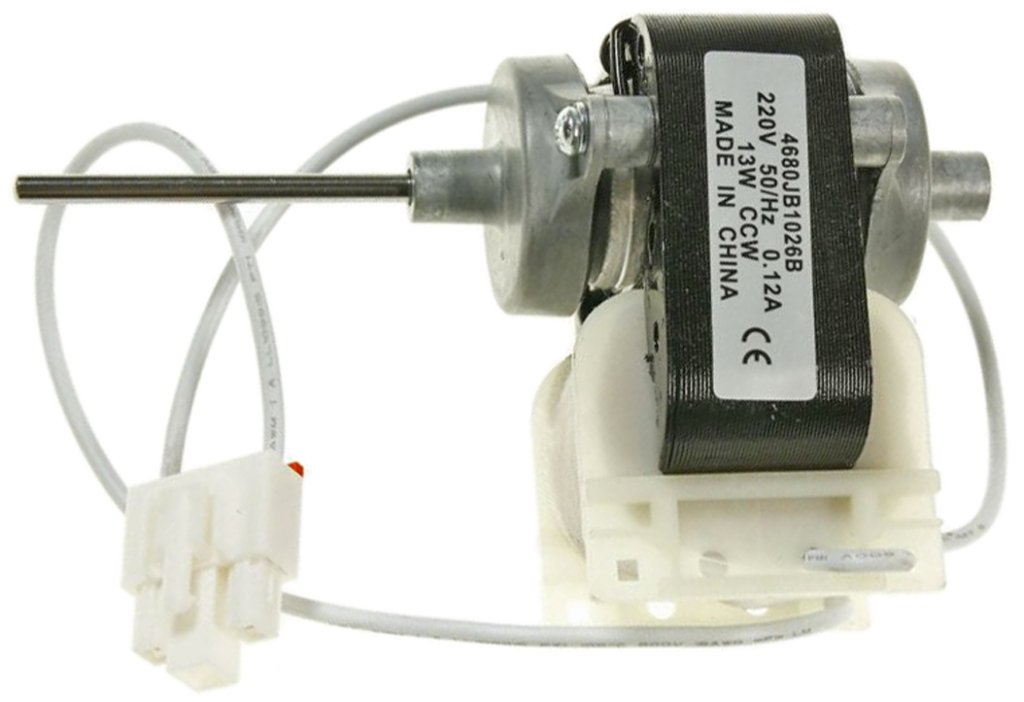
The condenser fan and the evaporator fan are located next to the condenser coils and inside the freezer compartment, respectively. They help to circulate the air over the coils to dissipate the heat and distribute the cold air. If the fans are not working properly, the coils will not be able to release the heat and the cold air will not reach the fridge and freezer sections. The fans may stop working due to a faulty motor, a broken blade, or a blockage by debris or ice.
Solution: Replace or Repair the Fan
To replace or repair the fan, you will need a screwdriver, a pair of pliers, and a replacement fan. Follow these steps:
- Unplug the refrigerator from the power source and open the refrigerator door.
- Locate the fan inside the refrigerator. It may be attached to the wall of the fridge or the air duct. It may be covered by a plastic housing or a metal clip. Remove the housing or the clip and disconnect the wires from the fan using the pliers.
- Remove the screws that hold the fan in place and pull out the fan.
- Inspect the fan for any signs of damage or obstruction. If the fan is damaged, replace it with a new one. If the fan is blocked by debris or ice, clear the blockage and test the fan. If the fan is still not working, replace it with a new one.
- Install the new fan and reconnect the wires using the pliers. Secure the fan with the screws and the housing or the clip.
- Plug the refrigerator back in and check if the cooling performance has improved.
Faulty Start Relay, Start Capacitor, or Run Capacitor
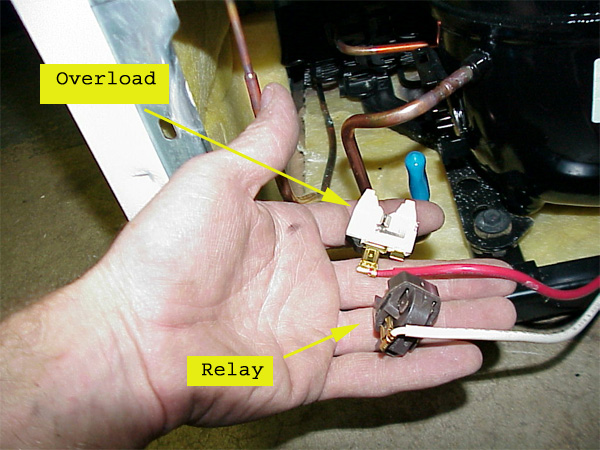
The start relay, the start capacitor, and the run capacitor are small devices that help to start and run the compressor by providing a boost of power. They are attached to the side of the compressor and are connected by wires. If any of these devices are faulty, the compressor will not start or run properly and the refrigerator will not cool down. The devices may fail due to wear and tear, power surges, or overheating.
Solution: Replace the Device
To replace the device, you will need a screwdriver, a pair of pliers, a multimeter, and a replacement device. Follow these steps:
- Unplug the refrigerator from the power source and pull it away from the wall.
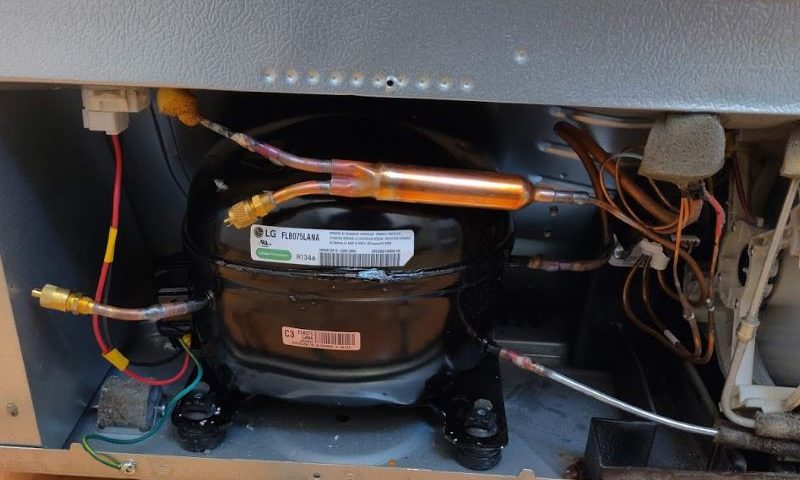
- Locate the compressor at the back or the bottom of the refrigerator. It is a black or silver cylinder with tubes and wires attached to it. It may be covered by a metal or plastic panel. Remove the panel and expose the compressor.
- Locate the start relay, the start capacitor, and the run capacitor on the side of the compressor. They are small boxes or cylinders with wires connected to them. They may be held by clips or screws. Remove the clips or the screws and disconnect the wires from the devices using the pliers.
- Test the devices for continuity using the multimeter. Set the multimeter to the ohms setting and touch the probes to the terminals of the devices. The multimeter should show a low resistance reading for the start relay and the run capacitor, and a high resistance reading for the start capacitor. If the multimeter shows no reading or an out-of-range reading, the device is faulty and needs to be replaced.
- Install the new device and reconnect the wires using the pliers. Secure the device with the clips or the screws.
- Replace the panel and push the refrigerator back to the wall.
- Plug the refrigerator back in and check if the cooling performance has improved.
Faulty Thermistor
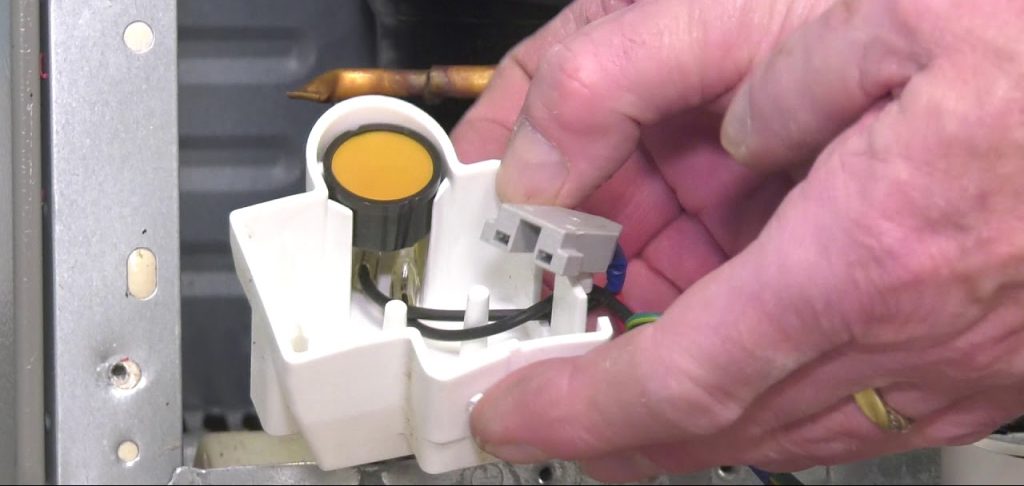
The thermistor is a small sensor that monitors the temperature inside the refrigerator and sends the signal to the control board to regulate the cooling cycle. If the thermistor is faulty, the control board will not receive the correct temperature reading and will not activate the compressor or the fans when needed. The refrigerator will either overcool or undercool, depending on the type of thermistor failure.
Solution: Replace the Thermistor
To replace the thermistor, you will need a screwdriver, a pair of pliers, a multimeter, and a replacement thermistor. Follow these steps:
- Unplug the refrigerator from the power source and open the refrigerator door.
- Locate the thermistor inside the refrigerator. It is usually attached to the wall of the fridge or the air duct. It may be covered by a plastic housing or a metal clip. Remove the housing or the clip and disconnect the wires from the thermistor using the pliers.
- Test the thermistor for resistance using the multimeter. Set the multimeter to the ohms setting and touch the probes to the terminals of the thermistor. The multimeter should show a resistance reading that changes according to the temperature. Refer to the owner’s manual or the manufacturer’s website for the correct resistance range for your model. If the multimeter shows no change or an out-of-range reading, the thermistor is faulty and needs to be replaced.
- Install the new thermistor and reconnect the wires using the pliers. Secure the thermistor with the housing or the clip.
- Plug the refrigerator back in and check if the cooling performance has improved.
Faulty Compressor
The compressor is the heart of the refrigerator and is responsible for compressing and circulating the refrigerant through the coils. The compressor is located at the back or the bottom of the refrigerator and is connected to the start relay, the start capacitor, and the run capacitor. If the compressor is faulty, the refrigerator will not cool down at all. The compressor may fail due to wear and tear, power surges, or low refrigerant level.
Solution: Replace the Compressor
To replace the compressor, you will need a professional technician, as this is a complex and risky task that involves handling high-pressure refrigerant and electrical components. Do not attempt to replace the compressor by yourself, as you may cause more damage to the refrigerator or harm yourself. Contact a qualified GE service center and schedule an appointment for the compressor replacement.
Low Refrigerant Level
The refrigerant is the substance that absorbs and releases heat inside the refrigerator. The refrigerant flows through the coils and changes its state from liquid to gas and back. The refrigerant level should be maintained at a certain level for the refrigerator to work properly. If the refrigerant level is low, the refrigerator will not cool down sufficiently. The refrigerant level may drop due to a leak in the system, a faulty valve, or a faulty compressor.
Solution: Recharge the Refrigerant
To recharge the refrigerant, you will need a professional technician, as this is a complex and risky task that involves handling high-pressure refrigerant and electrical components. Do not attempt to recharge the refrigerant by yourself, as you may cause more damage to the refrigerator or harm yourself. Contact a qualified GE service center and schedule an appointment for the refrigerant recharge.
How to Prevent Your GE Refrigerator from Not Cooling in the Future
To prevent your GE refrigerator from not cooling in the future, you can follow some simple maintenance tips, such as:
- Clean the condenser coils regularly, at least once every six months, to remove dust and dirt that can affect the heat transfer and cooling efficiency.
- Check the condenser fan and the evaporator fan for any signs of damage or obstruction and replace or repair them if needed.
- Check the start relay, the start capacitor, and the run capacitor for any signs of wear and tear or damage and replace them if needed.
- Check the thermistor for any signs of malfunction or damage and replace it if needed.
- Check the compressor for any signs of wear and tear or damage and replace it if needed.
- Check the refrigerant level and the system for any signs of leaks or faults and recharge or repair them if needed.
- Avoid placing hot or warm food inside the refrigerator, as this will increase the cooling load and make the refrigerator work harder.
- Avoid opening and closing the refrigerator door frequently, as this will let the cold air escape and make the refrigerator work harder.
- Adjust the temperature settings according to the ambient temperature and the amount of food stored in the refrigerator, as this will optimize the cooling performance and energy consumption.
FAQs
Here are some of the most frequently asked questions about GE refrigerator not cooling and their answers:
How do I reset my GE refrigerator?
To reset your GE refrigerator, you can try unplugging it from the power source and waiting for a few minutes before plugging it back in. This may clear some minor glitches or errors in the system. Alternatively, you can try pressing and holding the power button on the control panel for a few seconds until the display turns off and then turns back on. This may reset the control board and the settings.
How do I know if my GE refrigerator is under warranty?
To know if your GE refrigerator is under warranty, you can check the owner’s manual or the receipt for the purchase date and the warranty period. You can also contact the GE customer service and provide them with the model number and the serial number of your refrigerator to verify the warranty status.
How much does it cost to repair or replace a GE refrigerator compressor?
The cost to repair or replace a GE refrigerator compressor may vary depending on the model, the type of compressor, the extent of damage, and the labor charges. According to some online sources, the average cost to repair or replace a GE refrigerator compressor ranges from $200 to $500, excluding the service fee.
How long does a GE refrigerator last?
The lifespan of a GE refrigerator may depend on several factors, such as the model, the usage, the maintenance, and the quality. According to some online sources, the average lifespan of a GE refrigerator is about 13 years, but it may vary depending on the individual circumstances.
Conclusion
GE refrigerator not cooling is a common problem that can have various causes and solutions. Some of the causes are simple and easy to fix, such as dirty condenser coils or faulty fans, while others are complex and require professional assistance, such as faulty compressor or low refrigerant level. By following the steps and tips in this post, you can troubleshoot and fix your GE refrigerator not cooling problem and prevent it from happening again in the future.
If you need further help or advice, you can contact the GE customer service or a qualified GE service center and schedule an appointment for the repair or replacement of your refrigerator. We hope this post was helpful and informative for you. Thank you for reading and have a great day!
About Author
Anselam Ozioma
Anselam Ozioma is the founder and editor of refrigeratorfixes.com, a website dedicated to providing helpful and practical information and solutions for various refrigerator issues. Anselam Ozioma is a certified refrigerator technician with over 10 years of experience in repairing and maintaining different brands and models of refrigerators. He is passionate about sharing his knowledge and expertise with his readers and helping them to troubleshoot and fix their refrigerator problems. Anselam Ozioma also reviews and recommends the best refrigerators and accessories on the market, based on his personal and professional experience. Anselam Ozioma lives in Abuja, Nigeria, with his wife and two children. When he is not working on his website or fixing refrigerators, he enjoys reading, playing soccer, and spending time with his family.